
How to Make Perfume at Home
Did you know? The global perfume industry is valued at over $60 billion as of 2025. Yet many fragrance lovers are turning away from store-bought perfumes in favor of natural, homemade perfumes. Why? For one, a typical commercial fragrance can hide dozens of secret chemicals – the average perfume product contains about 14 undisclosed chemicals, including potential hormone disruptors like phthalates. By learning how to make perfume at home, you can avoid these mystery ingredients and craft a personalized scent that’s truly yours.
Equally appealing is the cost savings. High-end designer perfumes often cost $100 or more per bottle, but the same budget spent on DIY perfume supplies can produce several bottles of custom fragrance. In fact, the cost of essential oils per drop is just a few cents – meaning each bottle of homemade perfume might only cost you a few dollars in ingredients, compared to many store perfumes priced in the $50-$150 range.
Ready to create your own signature scent? This beginner-friendly guide will walk you through everything: perfume basics, essential ingredients, safety guidelines, three step-by-step methods (spray, roll-on, and solid perfume), some popular DIY recipes, advanced tips, and more. By the end, you’ll have all the knowledge to start making perfume at home with confidence. Let’s get started on your journey to an all-natural, personalized fragrance!
Understanding Perfume Basics
What Is Perfume?
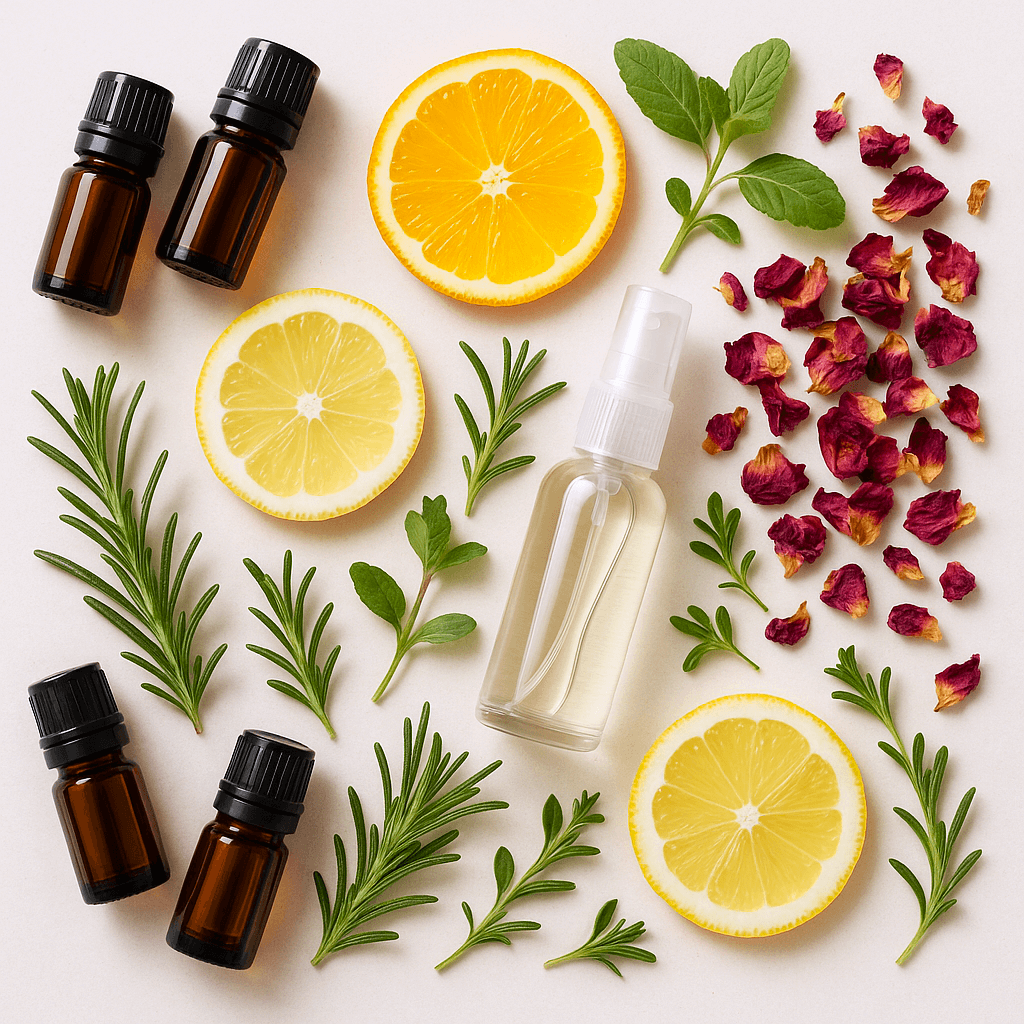
Perfume is essentially a mixture of fragrant oils or aroma compounds, plus fixatives and a solvent, used to give a pleasant scent to our bodies or surroundings. In most perfumes, the solvent is alcohol, which carries the fragrance and helps it evaporate when applied. The aromatic ingredients can be natural (from plants) or synthetic (lab-made).
- Natural vs. Synthetic Fragrances: Natural perfumes use botanical extracts like essential oils, absolutes, and resins for scent. Synthetic fragrances are man-made aroma chemicals – often designed to mimic natural scents or create novel smells. Most commercial perfumes today contain a blend of synthetics because they’re cheaper and sometimes longer-lasting. However, synthetic perfumes can contain additives like phthalates and other chemicals that some people prefer to avoid. Natural, homemade perfumes let you control exactly what’s in your scent, avoiding potential irritants and using simple, plant-derived ingredients. (For example, by making your own perfume you can skip the phthalates and petroleum-derived musks found in many store perfumes.)
- Benefits of Making Your Own Perfume: When you DIY your fragrance, you’re in charge. You can choose high-quality natural ingredients and customize the scent to perfectly suit your taste. Many find this empowering because you can tailor the fragrance profile (maybe you love lavender and hate vanilla – your perfume can reflect that!). It’s also reassuring from a health perspective: you know there are no hidden chemicals, so it’s often gentler for sensitive skin or allergies. Finally, as mentioned, it’s economical – you get luxury-quality scents at a fraction of the cost, and the same stash of essential oils can yield many different perfumes over time.
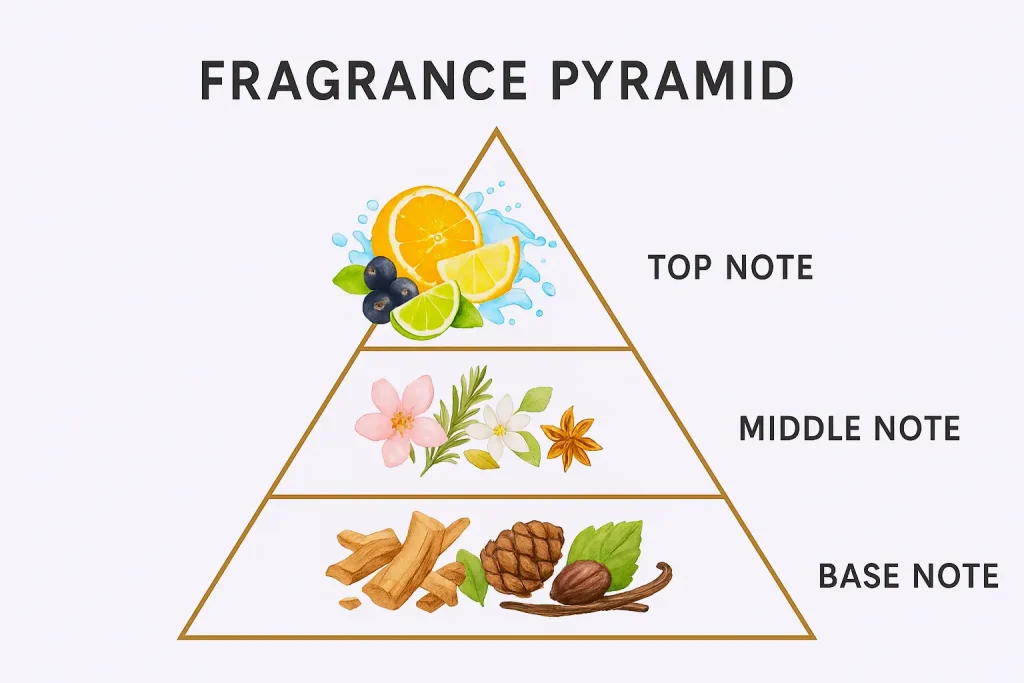
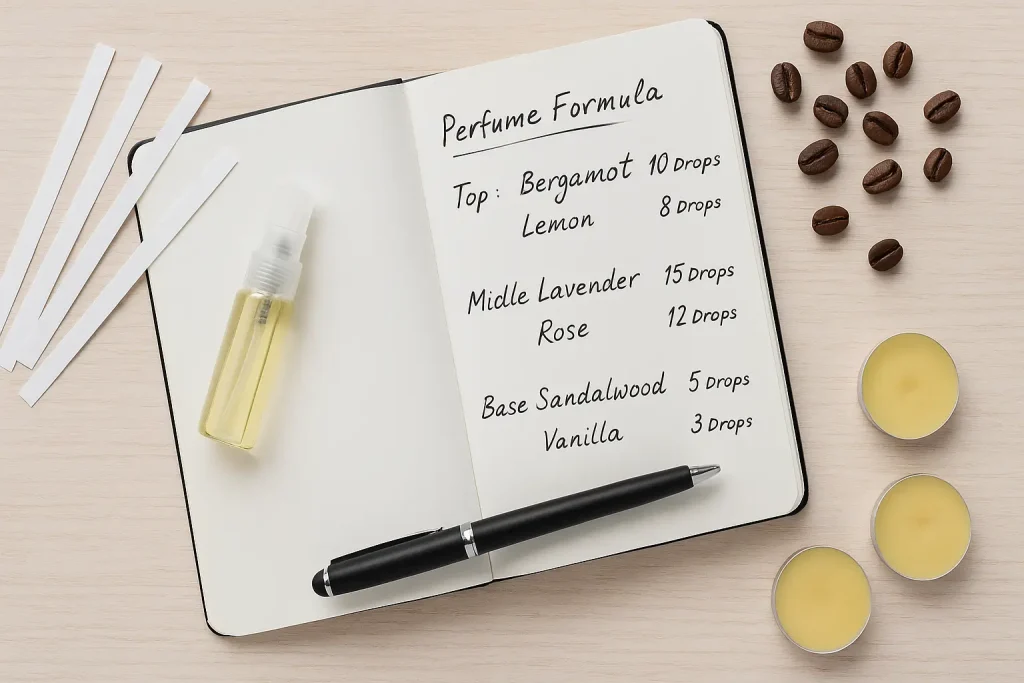
A perfume “fragrance pyramid” illustrating top, middle, and base notes, which evaporate at different rates. The Fragrance Pyramid: Perfumers often describe scents in terms of three layers of notes – top, middle, and base. This “fragrance pyramid” helps explain how a perfume’s scent unfolds over time:
- Top Notes: These are the initial, light scents you smell right away. Top notes tend to be bright and volatile – often citrus (like lemon, bergamot, grapefruit) or fresh herbs and mints. They evaporate quickest, usually within 5-15 minutes of application. Top notes give the first impression of the perfume. Think of that burst of citrus when you first spritz a fragrance – that’s the top note making its cheerful hello. Common top note oils: lemon, sweet orange, bergamot, grapefruit, peppermint, eucalyptus.
- Middle Notes: Also called “heart notes,” these form the core of the perfume. Middle notes emerge as the top notes fade, typically 10-30 minutes in, and can last for an hour or more. They are often floral, fruity, or soft spice scents – for example, rose, jasmine, lavender, geranium, or coriander. The middle notes give the perfume its character – the main theme of the scent. In a floral perfume, this is where rose or jasmine shine, whereas in others it might be herbal or gourmand notes.
- Base Notes: These are the deep, grounding scents that linger the longest. Base notes evaporate slowly; they can remain for many hours (even overnight on clothing). They’re usually rich and earthy or creamy – think woods, resins, and musks. Examples: sandalwood, cedarwood, patchouli, vanilla, vetiver, frankincense. Base notes provide the foundation of the perfume and often act as fixatives, slowing the evaporation of the lighter notes. When you smell the dried-down scent on your skin hours later, you’re mostly smelling the base note layer.
All three layers work together to create a balanced fragrance that evolves over time. A helpful guideline for beginners is the “30-50-20” blending ratio: aim for about 30% base notes, 50% middle notes, and 20% top notes in your blend. In practice, if you’re using 10 total drops of essential oil, that might be 3 drops base, 5 drops middle, 2 drops top. This ensures you have a strong core and lasting base, with a nice burst of top note to start. (You can adjust ratios to your liking, but this is a great starting point for a well-rounded scent.) Also, always add oils in order – base first, then middle, then top – when mixing; this way you can smell how the fragrance builds and you won’t lose the fleeting top notes while composing your blend.
Essential Ingredients & Equipment
Making perfume at home doesn’t require a fancy lab, but you will need a few core ingredients and basic tools. Here’s your checklist:
Core Ingredients
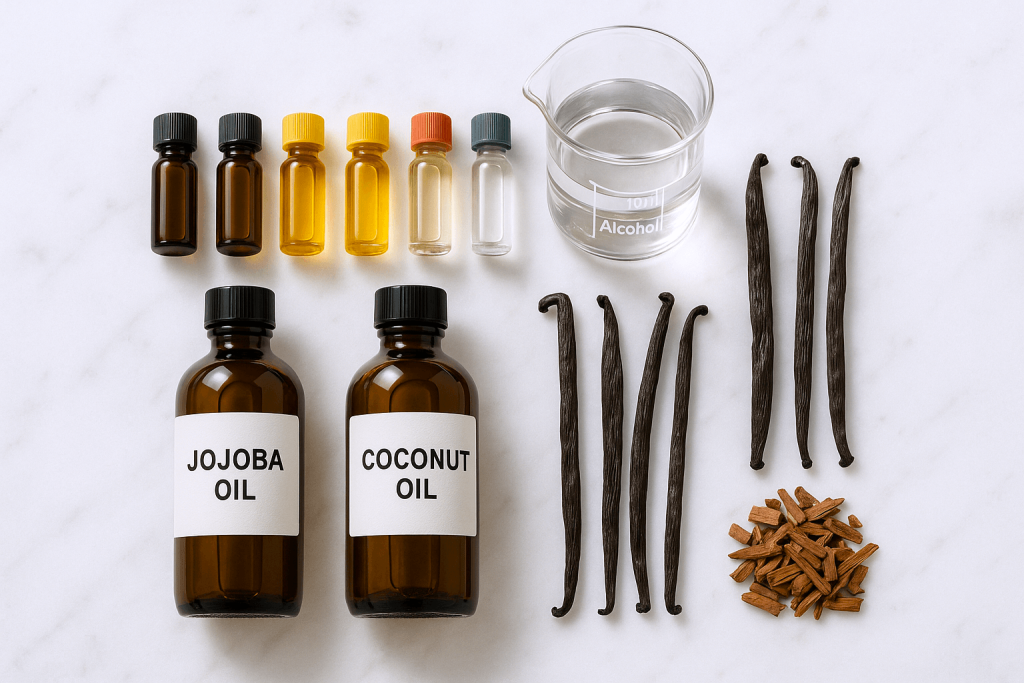
- Alcohol Base: If you’re making a spray perfume, you need a high-proof alcohol to dissolve the oils. Perfumers’ alcohol (denatured alcohol made for fragrance) is ideal, but you can also use a high-proof grain alcohol. Many DIY perfumers use vodka or Everclear because they’re clear and odorless. The higher the alcohol content (e.g. 190-proof Everclear), the better it will dissolve oils and carry the scent. Alcohol also helps the scent project and then evaporates cleanly from your skin. (If you prefer an alcohol-free perfume, see the oil-based method below.)
- Essential Oils: These are the fragrance powerhouses of your perfume. Essential oils are natural extracts from plants – they provide the actual scent notes (floral, citrus, woodsy, etc.). Quality matters here. Use high-quality, pure essential oils (organic if possible) from reputable suppliers. Cheaper oils may be diluted or synthetic and won’t give the same richness in your perfume. You’ll want a selection of oils across the note categories – e.g. some citrus top notes, some florals or herbs for middle, and some deeper oils like wood or spice for base. (Pro tip: Start with a small collection of your favorite scents. You can always expand later, but even 4-6 well-chosen oils can create a variety of blends.)
- Carrier Oils (for oil-based perfume): If you plan to make an oil-based roll-on perfume or solid perfume, you’ll need a neutral carrier oil to dilute the essential oils. The carrier makes it skin-safe and helps the scent adhere to your skin. Great carrier oils for perfume include jojoba oil, fractionated coconut oil, and sweet almond oil. These are lightweight and mostly odorless:
- Jojoba oil – a favorite for perfumes because it’s actually a liquid wax. It has an extremely long shelf life (it doesn’t go rancid) and a silky feel.
- Fractionated coconut oil – a clear, odorless form of coconut oil that stays liquid at room temp. Very stable and light.
- Sweet almond oil – light and skin-friendly, though it has a shorter shelf life (best used within a year). Great for making small batches you’ll use relatively soon.
- (Note: Avoid using heavy cooking oils or strongly scented oils as carriers – they can overpower or spoil the scent.)
- Jojoba oil – a favorite for perfumes because it’s actually a liquid wax. It has an extremely long shelf life (it doesn’t go rancid) and a silky feel.
- Fixatives: In perfumery, a “fixative” is an ingredient that helps stabilize and preserve the fragrance, usually by slowing the evaporation of the more volatile oils. Many natural fixatives are simply deep base-note ingredients. For example, benzoin resin (derived from tree resin) has a sweet balsamic aroma and is known to slow the dispersion of other scents, helping your perfume last longer. Other excellent natural fixatives include vanilla (vanilla oleoresin or extract) and sandalwood – these rich base notes “anchor” a blend and give it lasting power. You can also use a few drops of vetiver, patchouli, or oakmoss absolute as fixatives if you enjoy their scent. Tip: Use fixatives sparingly – a little goes a long way, and they should support the fragrance without dominating it. If you don’t have dedicated fixative ingredients, don’t worry; just including a higher percentage of base-note essential oils (like the ones mentioned) in your recipe also acts as a fixative.
Equipment Needed
You don’t need special machines – just some common tools dedicated to your perfumery:
- Dark Glass Bottles & Containers: Plan to store your finished perfumes in dark-colored glass bottles, such as amber or cobalt blue bottles. Why? Dark glass protects the oils from light, prolonging their shelf life. For spray perfumes, use glass spray atomizer bottles (2 oz or 1 oz sizes are common). For roll-on, get 10 ml glass roller bottles. And for solid perfumes, small tins or lidded jars work well. Avoid plastic containers for mixing or storage – concentrated essential oils can degrade plastic over time.
- Measuring Tools: You’ll want a way to measure both liquids and drops. Small graduated cylinders or measuring cups (marked in mL or ounces) are useful for measuring alcohol or carrier oil. Disposable pipettes or glass droppers are essential for measuring essential oils drop by drop and transferring liquids precisely. (Often your essential oil bottles may come with dropper caps, but having a few extra pipettes helps, especially if blending many oils.)
- Funnel and Mixing Supplies: A tiny funnel (often available to fit small bottles) makes it easy to pour your perfume into the bottle without spills. You’ll also need a few glass stirring rods or sticks (or use glass droppers) to stir your blends. Use a small glass bowl or vial for initially mixing essential oils – it’s easier to tweak your blend in a separate dish before pouring into the final bottle.
- Labels and Notebook: Don’t forget to label your creations! Keep stick-on labels or tags to name your perfumes and note the date. It’s also smart to keep a notebook or recipe journal where you record the exact ingredients (e.g. “Rose 5 drops, Jasmine 3 drops, Sandalwood 2 drops…”) for each batch. This way, if you create the perfect perfume, you’ll know how to reproduce it – or if a blend isn’t quite right, you can adjust next time.
- Storage Area: Find a cool, dark place in your home to store your ingredients and finished perfumes. A drawer or closed cabinet is great, as you want to avoid direct sunlight and heat which can degrade essential oils. Many DIY perfumers keep their supplies in a craft box or cabinet in a climate-controlled room (not a hot attic). Proper storage will keep your oils and perfumes fresh longer.
With these ingredients and tools on hand, you’re all set to start crafting your own fragrances. But before we dive into the fun part (blending!), let’s go over some important safety points and legal considerations.
Safety Considerations & Legal Requirements
When working with essential oils and making cosmetics like perfume, safety is key. Natural doesn’t automatically mean non-irritating – these oils are potent concentrates. Likewise, if you ever share or sell your perfumes, you’ll need to follow certain rules. Here’s what you need to know:
Essential Oil Safety
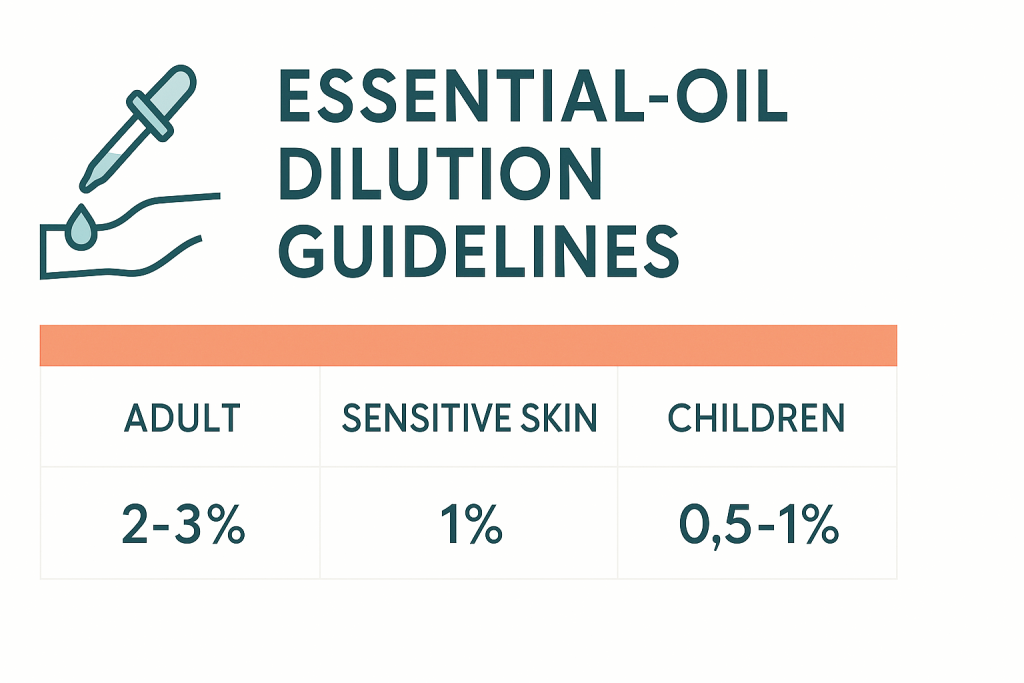
Dilution is Vital: Essential oils should always be diluted before applying to skin. Using them undiluted (neat) can cause irritation or allergic reactions, even with oils that smell “gentle”. For perfumery, we typically mix oils into alcohol or a carrier oil – this not only disperses the scent properly but also protects your skin. So, what’s a safe dilution? It depends on usage and the person:
- General Adult Use: Around 2-3% essential oil is a good rule of thumb for a leave-on product like perfume applied to skin. This means in 1 teaspoon (5 mL) of carrier, just 3 drops of essential oil is about a 3% dilution. Many DIY perfumes actually use a higher concentration (10-20%) to get a stronger scent throw, which can be okay for small “pulse point” applications. But if you have any sensitivity, err toward the lower side. Start small and see how your skin handles it.
- Sensitive Skin: If you know you have sensitive skin or allergies, stick to 1% or less essential oil in your blend. That’s roughly 1 drop per teaspoon of carrier. You can still enjoy a nice scent, just with a softer throw. It’s always easier to add more fragrance later than to deal with a reaction.
- Children: For children, use extra caution. Their skin is more delicate. A safe dilution for a child might be 0.5% to 1% (so just 1-2 drops of essential oil in 4 teaspoons of carrier) – or often, it’s best not to apply perfume to very young children at all. Keep in mind some essential oils are not safe for kids at any dilution (like peppermint or wintergreen due to respiratory concerns). When in doubt, consult a professional aromatherapist or stick with gentle oils like a tiny bit of lavender.
- “Hot” Oils to Handle Carefully: Some essential oils are known to be highly potent or irritating and require low dilution if used on skin. Examples include wintergreen, camphor, cinnamon, clove, oregano, and thyme. These contain compounds that can cause skin burning or other issues if overused. For instance, wintergreen oil is very high in methyl salicylate – even a few mL ingested can be fatal, and it can be harmful on skin if not extremely diluted. Clove oil and cinnamon bark oil are notorious skin irritants unless used at under 0.5%. If you’re a beginner, it’s safest to avoid these particular oils in your perfumes or use only a drop in a large batch. There are plenty of other lovely oils to choose from.
- Patch Testing: Whenever you create a new blend, do a quick patch test before dousing yourself. Apply a small amount of the diluted perfume on a small area of skin (like inside your forearm or behind your ear) and wait 24 hours to see if any redness, itching, or irritation occurs. This simple test can save you from a rash or allergic reaction down the road. If any irritation occurs, wash the area with soap and water, and reformulate your perfume with less essential oil or different oils.
- Photosensitivity: Citrus oils like bergamot, lemon, lime, grapefruit can make your skin more sensitive to the sun (they’re phototoxic). If your perfume contains significant amounts of those, avoid applying it to skin that will see intense sun, or use furocoumarin-free versions of those oils (like bergapten-free bergamot). As a rule, if you apply a perfume with citrus oils, don’t sunbathe or use a tanning bed for about 12-24 hours on that area of skin.
- Pregnancy: Certain essential oils are contraindicated in pregnancy (such as high doses of clary sage, certain spice oils, etc.). If you are pregnant or nursing, research each oil or consult a professional – or stick to very low dilutions of generally regarded safe oils like lavender, chamomile, or citrus. When in doubt, it’s okay to skip perfume during pregnancy, or use a tiny amount on clothing instead of skin.
The bottom line is to use common sense and listen to your body. Essential oils are amazing, but they’re powerful. Respect their potency by diluting appropriately, and your DIY perfumes will be both safe and enjoyable.
IFRA Standards & Compliance
If you’re new to perfumery, you might not have heard of IFRA. This stands for the International Fragrance Association, a global authority that sets safety guidelines for fragrance materials. IFRA publishes a set of Standards that professional perfumers follow to ensure products are safe for consumers.
What does this mean for you? Essentially, IFRA looks at scientific research (via the Research Institute for Fragrance Materials, RIFM) and decides how much of each ingredient is safe to use in different types of products. For example, a certain essential oil might be limited to (say) 0.5% in a body lotion (which is a leave-on product covering large area) but allowed at 5% in a perfume (which is used in small amounts on pulse points). These differences are because of how much exposure our bodies get from different products. IFRA certificates outline maximum usage levels for each fragrance ingredient by product category – perfumes, lotions, candles, soaps, etc.. The goal is to prevent skin irritation, sensitization, or other adverse effects by not exceeding proven safe concentrations.
For the hobby perfumer making things for personal use, IFRA guidelines are voluntary but highly useful. They effectively give you a safety benchmark. For instance, IFRA might limit clove bud oil or oakmoss in perfume because higher amounts could cause allergic reactions. By being aware of these limits, you ensure your creations are not only lovely but safe. If you stick to typical essential oil dilutions (in the single digits percentage-wise) you’re likely within most IFRA safety ranges. It’s when using potent absolutes or aroma chemicals at high doses that you’d need careful calculation.
However, if you plan to sell or give perfumes to others, following IFRA Standards becomes more crucial. In many countries (especially in the EU), fragrance products must comply with these standards – it’s effectively a legal requirement for cosmetics. Even in the US, while not explicitly required by law, adhering to IFRA is considered best practice to avoid liability. It shows you’ve formulated responsibly. Ignoring these safety standards could lead to issues if someone has an adverse reaction.
The good news is IFRA makes a lot of information public. They have an IFRA Standards Library on their website, and many essential oil suppliers provide IFRA usage guidelines for their oils. For a small-scale DIY project, you probably won’t delve deep into IFRA certificates, but it’s good to know they exist. In short, IFRA provides scientifically-backed safety levels for fragrance ingredients. By following basic guidelines (like the dilution ratios we discussed and avoiding banned substances), you’ll likely align with IFRA. And if you ever go pro with your perfumes, you’ll definitely be referencing these standards for compliance.
Legal Considerations
While making perfume at home for yourself doesn’t require any special permission, the situation changes if you decide to sell your homemade perfumes or even give them out widely. Here are a few points to consider:
- Home Use vs. Commercial Production: If you’re just crafting personal scents or gifting a bottle to a friend, you’re generally fine (apart from safety common sense). But once you start selling products, you become a manufacturer in the eyes of the law. For example, in the United States, perfumes are regulated as cosmetics by the FDA. You are legally responsible for the safety and proper labeling of cosmetic products you sell. This means you must follow regulations such as using approved ingredients (most essential oils are fine, but some substances are prohibited), not making false claims, and ensuring your perfume won’t hurt consumers under normal use.
- Labeling Requirements: Proper labels are a must for sold products. Generally, a perfume label should include: an ingredient list (with ingredients listed by their official names in descending order of amount, or you can simply list “Fragrance (essential oils)” plus the carrier and base), net contents (volume of product), your company name and address, and any required warning (for example, “For external use only. Do not use on broken skin. Discontinue use if irritation occurs.”). The FDA and the Fair Packaging and Labeling Act have specific guidelines on this. Ingredients are typically listed by INCI names (the scientific name or common name – e.g. Lavandula angustifolia (Lavender) oil). If selling in the EU, you also must list certain common allergens if they’re present above tiny amounts (like linalool, limonene – components of essential oils).
- Allergens and Testing: Speaking of allergens, serious commercial perfumers often get a product safety assessment especially if selling in EU (where it’s mandatory to have a Cosmetic Product Safety Report). Even if not required in your locale, it’s wise to test your formula on a small group of volunteers for any reactions, and possibly do a stability test (ensure it stays good over time).
- Insurance and Liability: When selling anything people apply to their bodies, it’s prudent to get product liability insurance. This would protect you in the event someone had a bad reaction and made a claim. It’s a worst-case scenario, but better safe than sorry. Also, keep good documentation of your formulas and ingredient sources in case of any issues.
- Bureaucracy: Depending on your country/state, you might need a business license or to adhere to local cosmetics manufacturing regulations if you’re producing from home. Always check local laws. For example, some places allow home cosmetic production, others might require a licensed commercial space for manufacturing once you reach a certain scale.
In summary, for personal DIY use, relax and enjoy, just follow safe usage practices. If you venture into selling perfumes, educate yourself on cosmetic regulations in your market. It’s not too difficult for perfume (compared to say, sunscreen which is a drug), but it does require responsibility. A good start is reviewing the FDA’s guide for small cosmetic businesses or the EU cosmetic regulation summary if in Europe. That way, your lovely creations keep others safe and keep you on the right side of the law.
Now, let’s move on to the fun part – making the perfume!
Step-by-Step Perfume Making Methods
There are several ways to make perfume at home. We’ll cover three beginner-friendly methods: an alcohol-based spray perfume (like a classic perfume spray), an oil-based roll-on perfume, and a solid balm-like perfume. Each method has its perks, so you can choose what suits you. Feel free to try all three!
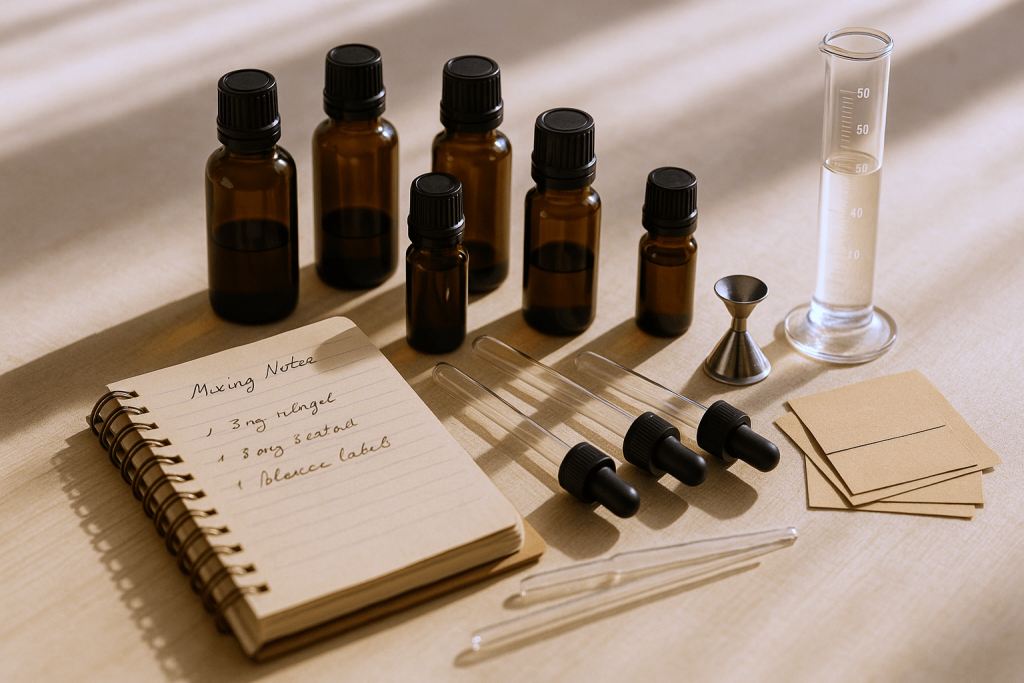
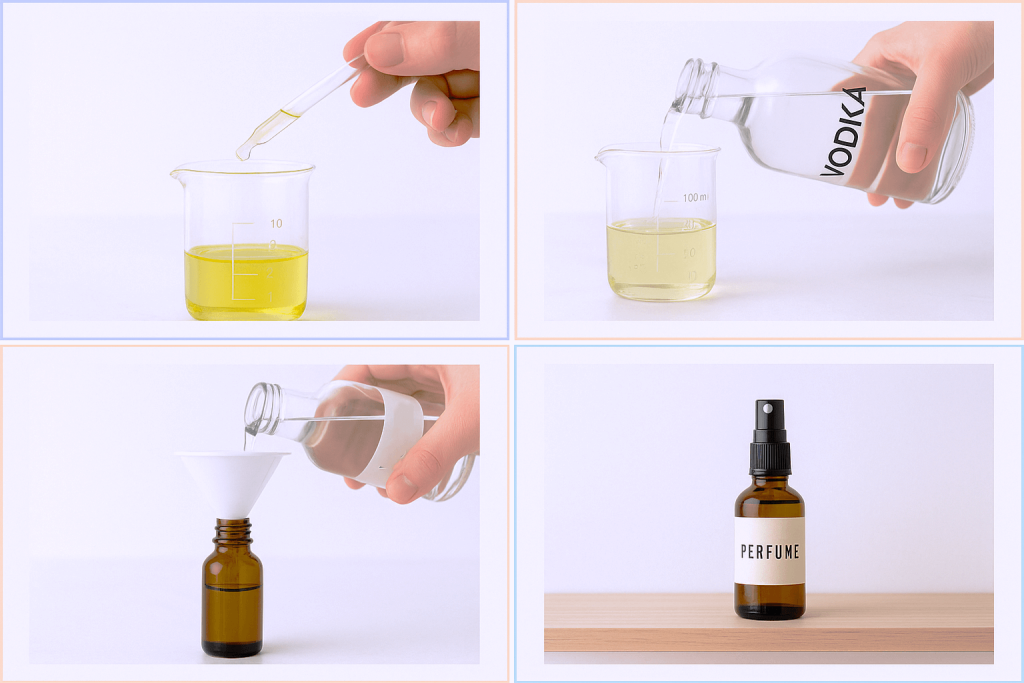
Creating a DIY perfume: Using droppers and a funnel to mix essential oils into a bottle.
Before you begin, prepare your workspace. Work in a clean area with no strong odors (so you can smell your blend accurately). Clean all your tools with warm soapy water and dry them well. Have paper towels handy for any drips. It’s also helpful to have some coffee beans or grounds nearby – sniffing coffee between smelling your mixtures can “reset” your nose.
Let’s go through each method step by step:
Method 1: Alcohol-Based Spray Perfume
This method produces a classic spray perfume (eau de parfum style) using an alcohol base. It’s great for a fine mist application and typically gives a stronger initial projection.
Ingredients (Makes 2 ounces of perfume):
- 2 oz high-proof alcohol – e.g. vodka or Everclear (at least 40% alcohol, ideally 75-95% for best results).
- 45-60 drops essential oils – This is your fragrance blend. You can use a single essential oil or (more commonly) a mixture of oils (following the fragrance pyramid ratio). For example, you might use 10-15 drops of base notes, 20-30 drops of middle notes, and 10–15 drops of top notes to total 50 drops.
- 1 tablespoon distilled water – Helps dilute the mix slightly and mellow the alcohol’s harshness. (Avoid tap water, as minerals or impurities could affect your perfume or cause cloudiness.)
Instructions:
- Blend the Essential Oils: In a small glass beaker or bowl, combine your chosen essential oils. Start with the base note oils, then add middle, then top notes, stirring gently after each addition. This is where you create your scent “formula.” Take your time to get a blend you love – swirling and sniffing (you can dip a test strip or cotton swab to smell). Write down how many drops of each you use.
- Add Alcohol: Pour the measured alcohol into the oil blend. Stir slowly but thoroughly to mix. The alcohol is the carrier that will disperse the oils. The mixture might look cloudy or colored depending on oils – that’s normal.
- Add Water: Slowly add the distilled water and stir. The water may turn the mixture a bit milky; don’t worry, it will usually clarify as it settles. (If it remains cloudy, it’s fine – it won’t affect the scent much.)
- Transfer to Bottle: Using a small funnel, carefully pour your perfume mixture into a dark glass spray bottle. Cap it tightly with the spray top. If there’s any headspace in the bottle, that’s okay. Give it a little shake.
- Let It Age: This step requires patience but will reward you. Store the bottle in a cool, dark place and let the perfume mellow for at least 48 hours before using. Even better, wait 2-6 weeks if you can. Aging (a process called “maceration”) allows the alcohol to fully integrate with the oils and the various scent notes to harmonize. Over this period, you’ll notice the scent becomes smoother and sometimes stronger as the oils mingle. (Many DIY perfumers find a 2-4 week age is the “sweet spot”.) After aging, if you find the scent too strong, you can add a bit more alcohol or water to lighten it; if too light, you might need to tweak in a future batch with more oils.
Your spray perfume is now ready! Spritz it on pulse points (wrists, neck). Remember: natural perfumes are generally softer and may not last as long on the skin as commercial perfumes (which often use synthetic fixatives). It’s normal to reapply every few hours. But you also won’t overwhelm the room or get a headache from your own scent – a bonus of going natural!
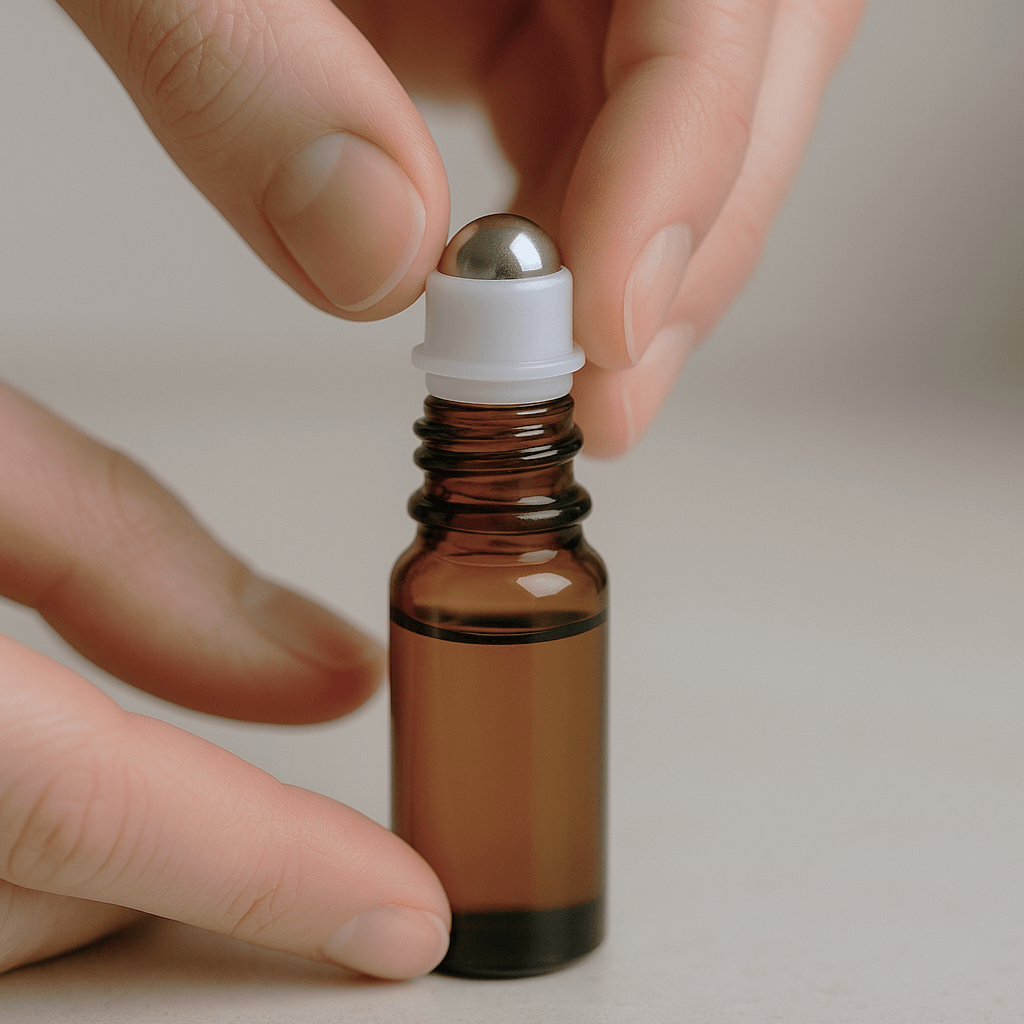
Method 2: Oil-Based Roll-On Perfume
If you’d prefer to avoid alcohol or want a gentler perfume for direct skin application, an oil-based perfume is ideal. These are applied with a rollerball and have a silky feel. The scent stays closer to the skin (more subtle sillage) and can actually last longer on the skin since oils don’t evaporate as fast as alcohol.
Ingredients (Makes one 10 ml roll-on):
- 10 ml glass roller bottle (with ball and cap) – dark glass preferred (amber/cobalt). 10 ml is about 2 teaspoons.
- 12-25 drops essential oils – The total number of drops depends on desired strength; 12 drops is roughly a 2% dilution in 10 ml, while 25 drops is ~5% dilution. For most people, somewhere around 15-20 drops (3-5% dilution) gives a nice balance of strength and safety for a roll-on. Use any combination of oils (top/middle/base) that you like – see the recipe ideas below for inspiration.
- Carrier oil to fill the rest (about 2 teaspoons) – Jojoba oil or fractionated coconut oil are top choices, as they’re light and long-lasting.
Instructions:
- Add Essential Oils: Remove the cap and rollerball from your bottle. Using a dropper, add your essential oils into the empty bottle, drop by drop. (A small funnel can help, or just a steady hand – 10 ml bottles have narrow necks.) It’s usually easiest to add each oil in the blend by count: e.g. 5 drops of your base, 8 drops middle, 4 drops top, etc.
- Fill with Carrier Oil: Using a clean dropper or small funnel, top off the bottle with your carrier oil. Leave a tiny bit of air space at the top so the roller insert can be inserted without overflowing. You should have about 9.5 ml of carrier to go with those essential oil drops (since 0.5 ml might be the essential oils themselves in 25 drops). Note: If using jojoba and it’s cold, let it come to room temp so it flows easily.
- Cap and Mix: Insert the rollerball into the bottle opening and press down until it fits snugly. Screw on the cap. Now gently invert the bottle a few times and shake it to thoroughly mix the oils with the carrier.
- Let it Rest: Allow the roll-on perfume to sit for 24-48 hours before first use. This short rest lets the scents meld with the carrier oil. Oil-based perfumes don’t require as long of an aging time as alcohol perfumes, but they do benefit from at least a day of “marrying”.
- Use: Roll onto pulse points (wrists, inner elbows, neck). The oil will leave a slight sheen – massage it in lightly. Enjoy the subtle, intimate fragrance. Oil perfumes are great for those with dry skin (the oil is moisturizing) and for a more personal scent aura (you won’t announce your perfume across a room, which some prefer).
Oil perfumes tend to wear a bit longer on the skin than alcohol ones, since oil clings to the skin. However, they project less – others will only catch whiffs when they’re fairly close. This makes them wonderful for workplace or travel, where you want to smell good without bothering neighbors. And if you have very sensitive skin, a roll-on with a mild dilution might be your best bet for all-day use.
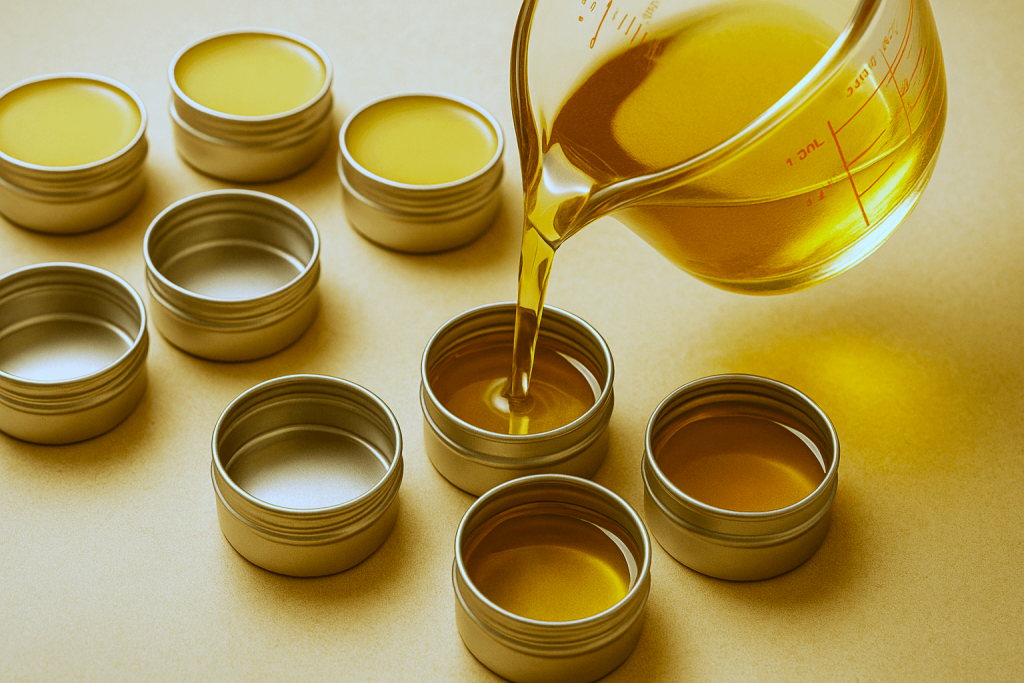
Method 3: Solid Perfume
Solid perfumes are fun to make and ultra-portable. They’re basically like a perfume balm that you can carry in a tiny tin and rub onto your skin. They also double as a little skin moisturizer because of the oils and wax. Solid perfumes are made by setting your oils in a wax base (much like making lip balm).
Ingredients (Makes about 0.5 oz solid perfume):
- 1 tablespoon carrier oil – e.g. jojoba, sweet almond, or coconut oil. (This is 15 mL.)
- 2 teaspoons beeswax (or candelilla wax for a vegan alternative) – grated or as pastilles. Beeswax will give a firm but spreadable texture. 2 tsp is roughly 8-10 grams. If you want a softer solid (more balm-like), use a touch less wax; for a firmer, use a bit more.
- 15-17 drops essential oils – About a 3-5% concentration in this amount of base. You can use up to 20 drops for a stronger scent (be cautious with skin-sensitive oils). Choose oils that complement the warm, creamy base – florals, woods, and spices do well. (For example: 5 drops orange, 5 drops ylang ylang, 5 drops sandalwood, 2 drops vanilla.)
- Optional: 1 capsule of Vitamin E – You can pierce a vitamin E capsule and add a few drops (about 0.1 tsp). Vitamin E acts as an antioxidant to help extend the shelf life of the oils (and is skin-loving). Not required but nice if you have it.
Instructions:
- Melt Wax and Oil: Set up a double boiler – this can be as simple as a heat-proof glass measuring cup or bowl set into a small saucepan of simmering water. Place the beeswax and carrier oil in the glass container. Heat gently over the simmering water, stirring occasionally, until the wax completely melts into the oil. The mixture will be clear and uniform. Be careful not to overheat; just get it melted. (Use low heat; beeswax melts around 62°C/144°F.)
- Remove from Heat: Once melted, turn off the burner and carefully remove the container from the hot water. Let it cool for just a minute or so. You want it still liquid (so you can stir in oils) but not so hot that it will degrade the essential oils (which are heat-sensitive). If the container is too hot to touch for more than a moment, let it cool a bit further.
- Add Essential Oils: Stir in your pre-measured essential oils (and vitamin E, if using) into the warm wax-oil liquid. Stir gently but thoroughly for even distribution. You’ll need to work somewhat quickly, because as it cools it will start to thicken. Note: If it starts to solidify while you’re adding oils, put it back over the hot water for a moment to re-melt.
- Pour into Containers: Immediately pour the mixture into your small perfume tins or jars. Typical containers are 0.25 to 0.5 oz slider tins or little screw-top pots. You might use one larger tin or several small ones. Pour slowly to avoid spills. (If any bubbles form, you can poke them with a toothpick.)
- Cool and Set: Let the containers sit, undisturbed, at room temperature for a few hours until the perfume solidifies completely. It will turn opaque and firm up. Avoid moving them while hot to get a nice smooth surface. After 24 hours, it should be fully hardened and ready to use.
To use a solid perfume, rub your fingertip on the surface of the solid balm (the warmth of your skin will pick up some of the scented balm) and then apply it to pulse points or even through your hair ends. Solid perfumes provide a subtle scent and are great for travel – no spills, and they are typically allowed in carry-on since they’re not liquid. They also make lovely homemade gifts!
Solid perfumes do tend to stay very close to the skin (even more so than oil roll-ons) – they’re a personal whisper of fragrance. They also have a warm, skin-like quality since the beeswax and oils mingle with your skin’s own scent. Each time you use it, you’ll also moisturize that spot a little, which is a nice bonus.
Now that you know three different methods to make perfume, let’s explore some actual scent recipes you can try!
Popular Perfume Recipes
One of the joys of DIY perfume is blending unique scents. To get you started, here are a few beginner-friendly perfume recipes using essential oils. These recipes are organized by theme/scent family. Feel free to adjust the exact drop counts to your preference – think of these as templates. Each recipe below makes a small batch of perfume (you can scale up if needed):
(You can use these in any of the methods above. For an alcohol spray, mix the drops into 2 oz alcohol. For a roll-on, mix into 10 ml carrier oil. For a solid perfume, you can incorporate the drops into the melted wax base. Always remember to let the perfume age or rest as noted.)
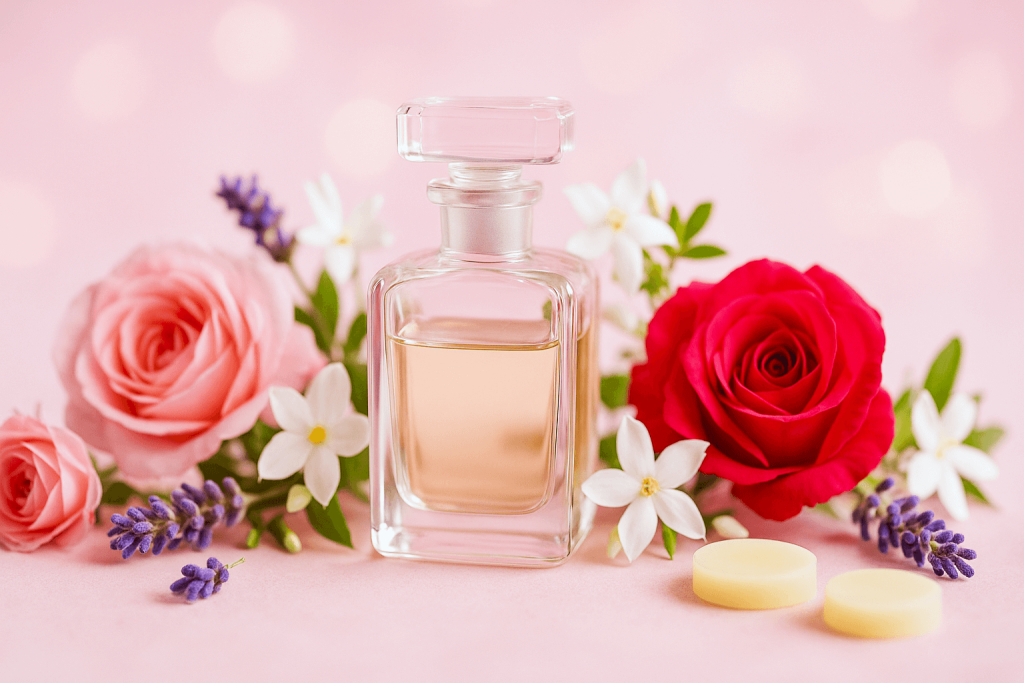
Floral Blend – “Romantic Bouquet” (Rose, Jasmine & Lavender)
A classic floral perfume with a romantic, soothing vibe. Great for daytime wear or whenever you want to feel feminine and elegant.
- Rose essential oil (or Rose Absolute): 5 drops
- Jasmine absolute or essential oil: 5 drops
- Lavender essential oil: 2 drops
Directions: Combine these 12 drops of oils to create a sweet floral accord. Rose brings a rich, romantic base, jasmine adds an intoxicating exotic floral heart, and lavender gives a soft, fresh top note. Add the blend to your perfume base of choice (alcohol or oil). If using alcohol, let it macerate a few days to smooth out the rose and jasmine. The result is a soft old-fashioned floral that isn’t overpowering. (For a twist, you can add 1 drop of bergamot for a hint of citrus in the opening, or a drop of vanilla to sweeten the base.)
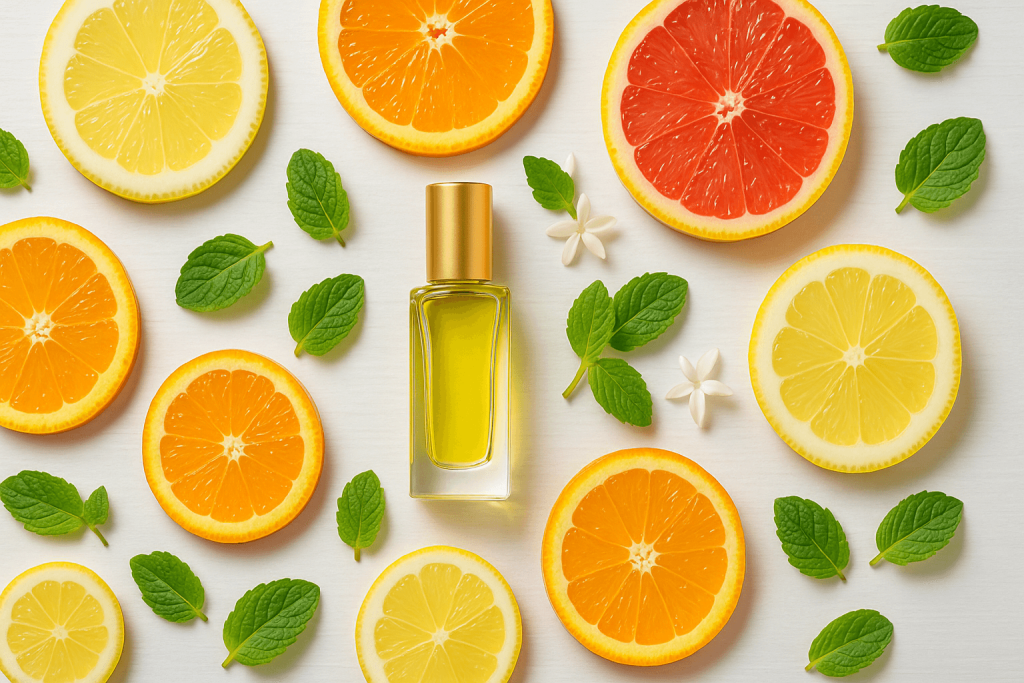
Citrus Fresh – “Sunny Citrus Medley” (Lemon, Orange, Grapefruit & Mint)
An uplifting, bright perfume that’s perfect for summer days or anytime you need a burst of energy. This one smells like sunshine in a bottle – very gender-neutral and refreshing.
- Sweet Orange essential oil: 4 drops
- Lemon essential oil: 4 drops
- Grapefruit essential oil: 2 drops
- Spearmint or Peppermint essential oil: 2 drops
Directions: Mix these 12 drops to get a zesty, mint-kissed citrus blend. Orange and lemon dominate the top notes with cheerful, sweet and tart tones, grapefruit adds a tangy twist, and a touch of mint brings cool freshness to the mix. This blend is very top-note heavy (citrus and mint are all top notes), so it will come on strong and bright then fade faster than heavier perfumes. To use, add the oils to your base and shake. Tip: Since light citrus oils evaporate quickly, consider adding a fixative to this recipe – e.g. 1 drop of cedarwood or frankincense – to give it a little base so the scent lasts longer. Even on its own, it’s a lovely pick-me-up perfume, even if you reapply by lunchtime. It’s also a great room or linen spray scent!
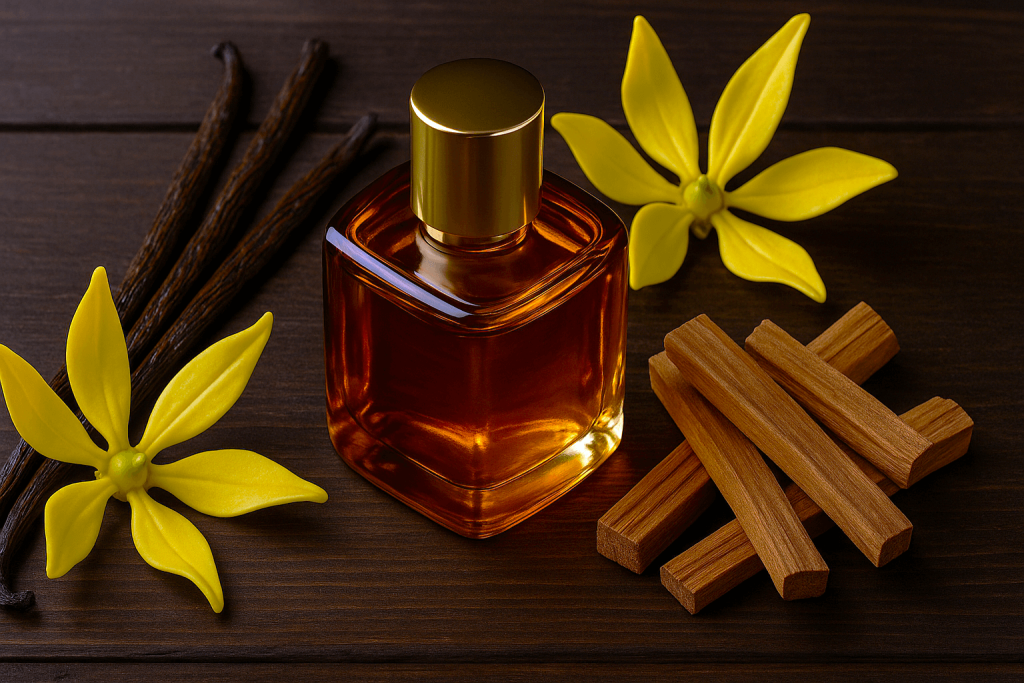
Exotic Oriental – “Vanilla Spice” (Vanilla, Ylang-Ylang & Sandalwood)
This blend is a sensual, exotic fragrance perfect for evenings or cooler weather. It has that oriental perfume character – sweet, warm, and a bit mysterious.
- Vanilla oleoresin or extract: 6 drops
- Ylang-Ylang essential oil: 3 drops
- Sandalwood essential oil: 5 drops
Directions: Combine the 14 drops of these luxurious oils. Vanilla gives a delicious sweet base (with balsamic undertones), sandalwood adds creamy wood depth, and ylang-ylang contributes an exotic floral-spicy note that forms the heart. Together, they create a rich and velvety scent. Add to your perfume base and mix well. This perfume will benefit from a longer aging – after blending, let it sit a week or more so the vanilla and woods really round out. The result is an alluring oriental fragrance with a natural warmth – wonderful as a personal perfume or even as a solid perfume (imagine a tiny vanilla-sandalwood balm – yum!). Note: Ylang-ylang is potent; if you find it too strong, reduce to 2 drops and you can add 1 drop of something like orange to brighten it.
Masculine Woody – “Forest Walk” (Cedar, Pine & Sandalwood)
A woodsy, grounding blend reminiscent of a walk in an evergreen forest. Traditionally it leans masculine, but it’s truly unisex – anyone who loves earthy, outdoorsy scents will enjoy this. It’s also a great base to tweak with a hint of floral or citrus if you want to soften it.

- Cedarwood essential oil: 5 drops
- Sandalwood essential oil: 4 drops
- Pine (or Fir Needle) essential oil: 3 drops
Directions: Mix these 12 drops to create a deep woodsy aroma. Cedarwood is dry and woody (almost leathery) and forms the strong foundation. Sandalwood adds a smooth, creamy wood note with a hint of sweet resin. Pine brings that fresh green, resinous top note like crushed pine needles, lifting the woods. Blend into your base and let it sit a couple days. The result is like inhaling the cool air of a forest. This makes a wonderful cologne-style scent. For unisex appeal, you can optionally add 2 drops of bergamot or lavender to lighten the mix – but it’s lovely as is. This blend also layers well with a dab of vanilla (if you want a slightly sweeter “cedar vanilla” vibe on some days).
Feel free to experiment with these recipes. You can swap an oil if you don’t have one (e.g. use geranium instead of rose in the Floral recipe for a more cost-effective mix, or vetiver instead of sandalwood in the Woody blend for an earthier tone). Perfume crafting is an art, and these formulas are just starting points. As you play with blends, you’ll discover what combinations you personally adore.
Advanced Techniques & Tips
Once you’ve tried a few basic perfumes, you might want to refine your skills. Here are some advanced tips to elevate your perfume-making and troubleshoot common issues:
Blending Mastery
- Keep a Scent Journal: As you create blends, record not just the recipe but your observations. How did it smell initially versus after a week? How does it smell on a tester strip vs. on your skin? These notes will train your nose and help you tweak future perfumes.
- Evaluating and Adjusting: When formulating, use test strips (or cotton swabs) dipped in the blend to smell the evolution over time. Evaluate the top note (first 5 minutes), then the heart (after 30 minutes), then the base (dry-down after an hour or more). If the perfume’s top feels too fleeting, maybe increase the percentage of top-note oils or add a fresher middle note to carry it. If the heart is weak, add more of your middle note oil or a complementary one. Adjust in small increments – it’s surprising how even a drop or two can shift a blend’s balance.
- Curing/Aging Process: We mentioned aging your perfume – truly, time is a perfumer’s best friend. For alcohol perfumes especially, a blend that seems a bit harsh or disjointed right after mixing can transform into something beautiful after it sits. If possible, make a few small test batches and let each age different lengths to see what the sweet spot is. Some perfumes bloom in 48 hours, others really round out after 4-6 weeks. Patience pays off!
- Seasonal & Skin Considerations: Be aware that a perfume may behave differently in different seasons. In hot summer weather, scents are stronger and evaporate faster – lighter, fresher blends work well and you might use a bit less concentration. In winter, our skin is drier and cold air mutes scents, so slightly richer, stronger perfumes shine. Also, your skin chemistry can make a scent smell unique on you. Always test on your own skin; an oil that is lovely on a blotter might turn a bit odd on your skin’s pH (for example, some people find jasmine can go “soapy” on them or that their skin “eats” citrus quickly). Learning how a note interacts with you will guide you in tailoring blends that truly suit you.
- Blending Order & Method: As mentioned, adding base notes first, then middle, then top while blending allows you to smell as you go. Another advanced trick is to blend your oils first without carrier, and let that concentrate sit for an hour or a day, then dilute. This is called a “perfume concentrate” – some perfumers find it melds the essential oils together nicely before the final dilution. You can also try the blotter method: put a drop of each component on separate paper strips, then hold them together and wave under your nose to get a sense of the combined scent before mixing. It’s a quick way to experiment with proportions without wasting drops.
- Trust Your Nose & Have Fun: Perfumery is both science and art. While guidelines like the fragrance pyramid and blending ratios are very useful, ultimately your nose is the boss. If a combination smells heavenly to you but “breaks” a rule, it’s fine! Some of the most interesting perfumes come from creative experimentation. Don’t be afraid to try unusual mixes. Lavender + pumpkin spice? Why not. Citrus with a drop of cumin? Could be intriguing. Play around – the stakes are low when working in drops, and you might surprise yourself with a new favorite blend.
Troubleshooting Common Issues
Even experienced DIY perfumers encounter blends that don’t turn out as expected. Here are some common problems and how to fix or prevent them:
- “My perfume is too strong!” – If you’ve overdone it on the essential oils and the scent is overpowering or headache-inducing, the fix is simple: dilute it more. Add more alcohol or carrier oil to your mixture to bring the concentration down. You can split the batch in two bottles and top both up with more base to effectively halve the strength. If it’s an alcohol perfume and it’s already aged, you might need to give it another day to remix after dilution. In the future, remember to start with less – you can always add a couple more drops of oil later, but it’s harder to take it out. Natural perfumes should be pleasantly noticeable, not overwhelming.
- “The scent is too weak/fades immediately.” – This is the opposite issue: you can barely smell it or it disappears in minutes. First, ensure you’re not anosmic to it – smelling one thing for too long can temporarily numb your nose to it. Test on someone else or smell something neutral then smell the perfume again. If it truly is too weak, you can add more essential oils (a few drops at a time) to bolster it. Focus on adding some longer-lasting base/middle notes to extend the life. For instance, if your all-citrus perfume fades, add a drop of cedar or a bit of a longer-lived citrus like bergamot. Also consider switching to an oil base or a solid perfume format – oil-based fragrances often have better longevity on the skin because they don’t evaporate as fast. And make sure you’re applying to moisturized skin or even on clothes/hair to make it last (dry skin won’t hold scent as long).
- “It doesn’t last at all – no longevity.” – This relates to the above. If longevity (lasting power) is your issue, here are some tips: increase the percentage of base notes in your formula (these are your fixatives). Oils like patchouli, vetiver, vanilla, woods, and resins significantly improve longevity. You can also try adding a natural fixative ingredient (we discussed benzoin, etc.). Additionally, consider the application: a light alcohol spray might be gone in 2 hours, whereas dabbing an oil-based version of that same perfume might give you whiffs all day. Some people even layer their perfume – e.g. use an unscented lotion, then apply perfume on top, or use an oil perfume then a light spritz of alcohol perfume – this layering can trap scent and make it last. Realistically, natural perfumes will never last as long as some commercial perfumes that use potent synthetic fixatives (some designer perfumes can last 8+ hours largely due to synthetics). A 3-4 hour wear from a natural perfume is actually pretty good. Carry a little refill spray or roll-on for refresh if you want it to go from day to night.
- “The scent changed or smells different than I expected.” – It’s common to be surprised by how a blend “blooms” after aging or how it smells on your skin. If your perfume after a week smells different (maybe the jasmine is dominating more than you wanted, or the blend got sweeter), make a note of it. This isn’t necessarily something to “fix” now, but to adjust in your next batch. You can tweak your formula – perhaps use less of the note that became too pronounced. Sometimes even temperature and storage affect scent; always smell your perfume in a few different contexts (on skin, on paper, in bottle cap) to get a full picture. And remember, it’s normal for a natural perfume to smell a bit different on different people due to body chemistry – for instance, a bit more floral on one person, a bit more woody on another. That’s part of the magic. If the scent truly went “off” (like smells bad), it could be an ingredient has spoiled – see Storage tips below.
- “It’s irritating my skin.” – If you notice redness or itchiness where you applied your perfume, stop using it on skin. You likely have a sensitivity to one of the ingredients or it’s too high concentration for you. The fix: dilute the perfume further, and definitely do a patch test after diluting. You might also identify the culprit oil by sniffing – common irritants include spice oils (cinnamon, clove), “hot” oils (mint, ginger), or simply an allergy to a floral like ylang-ylang. If you figure out which oil is causing it, you can reformulate without that oil (e.g. replace it with a gentler oil). When in doubt, keep perfume to cloth application (spray on your scarf or shirt) rather than directly on sensitive skin.
- Cloudy or Sediment in Perfume: If your alcohol-based perfume turns cloudy or develops sediment at the bottom, don’t panic. Some essential oils are not fully soluble in lower-proof alcohol, or if you added something like resin or vanilla extract, it can cloud. This is mostly aesthetic. You can fix a cloudy alcohol perfume by adding a bit more ethanol (higher proof) or a solubilizer, but if it doesn’t bother you, it’s fine. Sediment might be bits of undissolved resin or waxy compounds from an oil; you can filter the perfume through a coffee filter if it annoys you.
Most issues have a solution or simply teach you how to create a better batch next time. The more you practice, the more you’ll intuitively know how to balance a scent, just like a cook learns to adjust seasoning.
Storage & Preservation
Taking good care of your perfumes and ingredients will ensure they last as long as possible and stay smelling great.
- Store in a Cool, Dark Place: Heat, light, and air are the enemies of perfume. Always keep your perfumes in dark glass bottles (we mentioned this) and store them away from direct sunlight. A drawer, cabinet, or even a pretty storage box on a dresser works. Avoid storing perfumes in a bathroom if it gets hot and steamy daily – the fluctuations can degrade them. Room temperature or cooler is ideal (but not freezing). Consistency in temperature is more important than the exact degree.
- Keep Bottles Tightly Closed: Essential oils and alcohol can evaporate or oxidize when exposed to air. Make sure caps and spray tops are well-sealed. After using a perfume, recap it promptly. This also prevents accidental spills. If a bottle has a rubber dropper, note that over a long time the essential oils can degrade the rubber – if you’re storing for very long, transfer to a screw-cap bottle or check the droppers periodically.
- Shelf Life Expectations: How long will your homemade perfume last before it “goes bad”? This depends on ingredients:
- Alcohol-based perfumes tend to have the longest shelf life – roughly 1 to 3 years is a reasonable expectation, sometimes even longer (2-5 years) if well preserved. Alcohol itself is a great preservative (it’s antiseptic), so it prevents bacterial growth and slows oxidation of the oils. I’ve had simple alcohol perfumes still smell good after 5 years. Citrus notes might fade after a year or two, but the perfume overall can still be nice.
- Oil-based perfumes have a shorter life, often 6 months to 1 year is recommended. The limiting factor is the carrier oil, which can go rancid. Fractionated coconut and jojoba oils have very long shelf lives (jojoba can last many years because it’s not a true oil). Sweet almond or other plant oils might only last a year or so before smelling “off”. Using Vitamin E can help extend shelf life a bit by reducing oxidation. When your carrier oil goes bad, you’ll notice a change in smell (a bit like old cooking oil). So it’s a good idea to make oil perfumes in small batches you’ll use within a year.
- Solid perfumes follow the carrier oil/wax rule – they can last maybe a year or two. Beeswax itself is not very prone to spoilage, and if you used jojoba, a solid perfume might remain stable for a long time. But if you notice any change, toss it.
- Alcohol-based perfumes tend to have the longest shelf life – roughly 1 to 3 years is a reasonable expectation, sometimes even longer (2-5 years) if well preserved. Alcohol itself is a great preservative (it’s antiseptic), so it prevents bacterial growth and slows oxidation of the oils. I’ve had simple alcohol perfumes still smell good after 5 years. Citrus notes might fade after a year or two, but the perfume overall can still be nice.
- Signs of Deterioration: Always use your nose and eyes – if a perfume that used to smell lovely now has a weird off-note (like a crayon, waxy or sour smell), or if the color has dramatically darkened, or something separated that didn’t before, it might be past its prime. Sometimes perfumes darken naturally (vanilla-containing ones often turn deep amber over time – that’s not a problem). But if you see cloudiness in a once-clear perfume, or sediment that looks like growth, or the scent just isn’t the same, it’s safer to discard and make fresh. Essential oils themselves can oxidize and potentially become more irritating to skin as they age (especially citrus and pine oils). So when in doubt, err on the side of fresh.
- Make Small Batches: Since you’re at home and can always whip up more, you don’t need to make huge quantities that linger for years. It’s actually a joy of DIY perfume that you can make small batches, enjoy them for a season, then create new ones. This ensures you’re always using relatively fresh ingredients and also keeps you experimenting!
By storing your perfumes properly, you’ll ensure that that lovely blend you made stays true to itself until you’ve used the last drop. And storage is not just for perfumes – store your essential oils well too (tightly capped, in a cool dark place) because the quality of your oils going into a perfume will determine how the perfume holds up.
Finally, let’s consider the economics of your new perfume hobby and then wrap up with some parting thoughts and FAQs.
Cost Analysis & Economic Benefits
One major motivation for DIY perfume (aside from creativity and natural ingredients) is the potential to save money. Let’s break down the economics of making perfume at home:
Cost Comparison
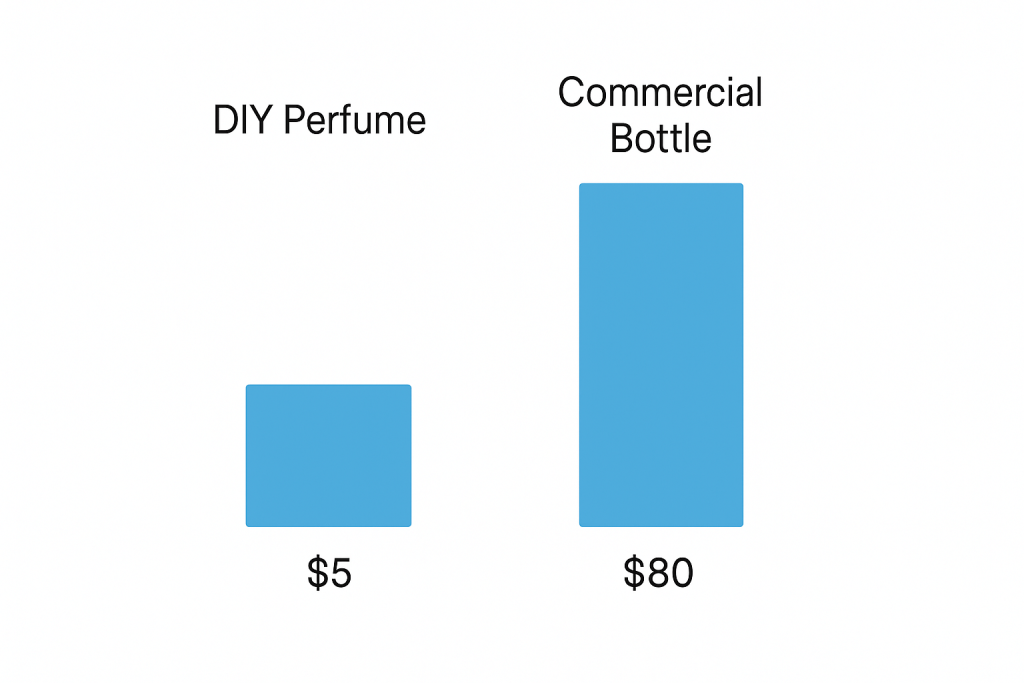
- Homemade vs. Commercial Perfumes: High-quality designer perfumes can be very pricey – anywhere from $50 to $300 for a 50 mL bottle is common for prestige brands. On the other hand, a homemade perfume of similar size might cost you just a few dollars worth of materials. As a rough illustration, many essential oils cost maybe $10-30 for a 10 mL bottle, which contains about 200 drops. If you use 20 drops in a recipe, that’s 1/10th of the bottle – maybe $1-$3 worth of that oil. The alcohol base cost is negligible per bottle (a $20 bottle of vodka can fill many perfume bottles). So the ingredient cost for one 2 oz perfume could be well under $5 (sometimes just $1-2). Compare that to, say, a $120 bottle of department store perfume – you’re getting a huge bang for your buck.
- Initial Investment: Of course, to get started, you do need to invest in some supplies. A basic perfumery starter kit might include 5-10 essential oils, a bottle of vodka or perfumer’s alcohol, some empty bottles, pipettes, etc. You might spend around $50-$100 initially to gather a nice selection of materials. For example, 5 oils at $15 each = $75, plus bottles and tools maybe $15, so $90. However, those supplies will yield many, many bottles of perfume. Think of it this way: one 10 mL bottle of lavender oil might make 20-40 perfumes depending on how much you use in each. So that initial stash is like a mini library of scents you can keep drawing from.
- Long-Term Savings: After the initial purchase, your ongoing costs are just replacing oils or base as you use them. If you find you love a particular blend, you might use up one oil faster. But even buying a new bottle of oil now and then, you’ll still be saving. It’s not unlike cooking at home vs eating out – buying groceries costs money, but over many meals it’s far cheaper per meal than restaurant prices. Similarly, the cost per perfume bottle drops dramatically when you DIY. You could make luxury-level blends (rose, jasmine, sandalwood) that would retail for hundreds of dollars, for a fraction of that by sourcing the ingredients yourself. Plus, you can make multiple gifts for friends at a very low cost. A DIY perfume in a pretty bottle makes a heartfelt gift that might have cost you $4 in materials – but the value to someone could be much higher (and no one needs to know it was so budget-friendly!).
- Hidden Value – No Waste: Ever bought an expensive perfume only to realize later you don’t love it? That’s money down the drain (or stuck on your shelf). With DIY, you make small batches and if you don’t love a blend, you haven’t sunk a fortune into it – you can tweak it or try again without feeling guilty. Also, you can reuse your bottles, so you’re not continuously paying for fancy packaging (which is part of the cost in commercial perfumes).
- Cost of Experimentation: Each test blend you make might use a few drops here and there – essentially a few cents. This means you can experiment widely for very little money. Once you dial in a fantastic recipe, you’re basically getting a boutique perfume for the price of an afternoon of fun and a few dollars in ingredients.
To put actual numbers: One DIY 2 oz (60 mL) perfume might contain about 50-100 drops of essential oil. If your oils average $0.10 per drop (that’s on the high side; many are less), that’s $5-$10 of essential oil. Alcohol and water maybe add $0.50. So call it $6 per bottle. Most will be even cheaper, especially if you use more affordable oils. Now consider a typical retail 50 mL perfume might be $80. You’re smelling pretty smart financially!
In essence, making perfume at home is extremely cost-effective, especially if you already enjoy essential oils for other uses. The initial investment pays itself off after just a few bottles. And the more you make, the more you save – while having the freedom to create scents that might even rival high-end brands in quality, since you’re using pure luxurious naturals.
Finally, there’s an intangible economic benefit: if you fall in love with this hobby, it could even become a side business or career. Many small indie perfume brands started with someone experimenting at home. Should you ever go that route, the profit margins on perfume can be significant. But that’s another story – for now, even as a personal endeavor, you’re likely to save money and smell fabulous doing it.
Conclusion & Call-to-Action
Making your own perfume at home is a rewarding blend of science, art, and self-expression. We’ve covered a lot of ground, so let’s recap a few key takeaways and next steps for your perfuming journey:
Key Takeaways:
- Safety First: Always remember to dilute essential oils appropriately and patch test new blends. Following basic safety guidelines (like those from IFRA and the Tisserand Institute) ensures your perfumes are not only delightful but also skin-safe. A 2-3% dilution is a good general rule, and be extra cautious with potent oils and on sensitive skin. When in doubt, less is more in terms of concentration.
- Scent Structure: Building a perfume with top, middle, and base notes in balance will yield a more complex and lasting fragrance. Aim for roughly 20% top, 50% middle, 30% base in your blends. This pyramid approach, combined with proper aging, gives your DIY scents a professional finish.
- Experimentation & Patience: Treat perfume crafting as a fun experiment. Not every trial will be a hit, and that’s okay. Learn from each blend. Give your perfumes time to mature before passing final judgment – some rough edges smooth out after a few weeks. With each batch, you’ll get better at predicting how a formula will turn out. Be patient with yourself and enjoy the creative process.
- Start Simple: If you’re feeling a bit overwhelmed by all the info, start with a simple recipe or even a single-oil perfume. For example, make a lavender roll-on or a vanilla solid perfume. Get the hang of the process, then build up to more complex blends. Mastering a basic 3-note blend is a great confidence booster. As you gain experience, you can try more exotic combinations and advanced techniques.
Next Steps – Take Your DIY Perfume to the Next Level:
- Try the Recipes: Use the sample recipes in this guide as a starting point. Pick one that appeals to you and make a small batch. There’s no substitute for hands-on practice – the sooner you dive in, the sooner you’ll start developing your nose and skills. Write down your results and tweak to your liking.
- Download Our Recipe Cards: To make it easier, we’ve prepared some printable recipe cards for the perfume blends above and a blank template for your own creations. (If this were on our blog, imagine a link here to a PDF.) Print them out or save them to jot down your favorites and keep track of your personal perfume library.
- Join the Community: Perfumery might be a solitary art at times, but there’s a whole world of fellow DIY perfumers out there eager to share tips and inspiration. Consider joining online communities like the /r/DIYfragrance subreddit or Facebook groups for natural perfumers. These communities are treasure troves of knowledge – you can ask questions, get feedback, or swap formulas. It’s a great way to learn and stay inspired.
- Learn From the Experts: If you want to delve deeper, check out resources from experts. The International Fragrance Association (IFRA) website has loads of information on fragrance safety and standards. The Tisserand Institute offers reputable guidance on essential oil safety and blending (their publications and courses can elevate your understanding of the science behind scents). For the science-minded, even academic resources on fragrance chemistry can be fascinating – for example, learning why certain molecules evaporate faster or how fixatives work on a molecular level. And if you really catch the perfume bug, there are books and even online classes on natural perfumery that can take you from hobbyist to artisan.
- Keep Creating: The best way to refine your craft is to keep making perfumes. Try seasonal scents (maybe a pumpkin-spice inspired solid perfume for autumn, or a beachy coconut-citrus spritz for summer). Experiment with making an accord (a blend of a few oils that becomes a new “note” you use in a bigger formula). You might even explore tincturing your own botanical extracts (advanced, but fun – like extracting scent from fresh jasmine blossoms into alcohol). Every time you create, you learn something new. And who knows – you might end up with a signature perfume that friends beg you to make for them!
Your journey into DIY perfumery is just beginning. With a foundation in the basics, a palette of lovely natural ingredients, and a spirit of curiosity, you have all you need to craft beautiful fragrances right from your home. There’s something truly special about wearing a scent you mixed by hand – it’s personal, unique, and tells your story.
So go ahead: gather a few oils and start blending. Trust your nose, enjoy the process, and don’t be afraid to make mistakes. Before long, you’ll have a dresser full of bespoke perfumes and the satisfying knowledge that you made them all by yourself.
FAQ
Q: Is it safe to make perfume at home?
A: Yes, absolutely – as long as you follow safety guidelines. Use proper dilution (generally 2-3% essential oils in a carrier for adults) and avoid known irritants in high amounts. Adhering to IFRA standards and basic essential oil safety (like patch testing and not using undiluted oils on skin) keeps the process safe and enjoyable.
Q: How long does homemade perfume last?
A: Shelf life varies by formula. An alcohol-based natural perfume can last about 1 to 3 years if stored in a cool, dark place. Oil-based perfumes have a shorter life – roughly 6 to 12 months is typical, since carrier oils can go rancid. Using stable carriers like jojoba and adding Vitamin E can extend the life a bit. Always check the scent; if it smells “off” or changed drastically, it’s time to make a fresh batch.
Q: Can I sell homemade perfume?
A: You can, but there are regulations to follow. In the US, perfumes are cosmetics, so you’ll need to comply with FDA cosmetic guidelines (proper labeling, safe ingredients, no illegal claims). In the EU and many other places, you must adhere to strict cosmetic safety laws (including perhaps a safety assessment). You should also consider product liability insurance. Start small and research the legal requirements in your country before selling. Many indie perfumers do sell successfully, but make sure you cover the legal bases to protect both yourself and your customers.
Q: What’s the difference between essential oils and fragrance oils?
A: Essential oils are natural extracts from plants – they contain the actual volatile compounds from leaves, flowers, woods, etc. (For example, pure lavender oil steam-distilled from lavender flowers.) Fragrance oils, on the other hand, are usually synthetic or blended substances created to mimic scents. They may contain some natural ingredients but often include man-made aroma chemicals. Fragrance oils can achieve scents that are hard to get naturally (like “apple pie” or “ocean breeze”), but they’re not all-natural. If you want a fully natural perfume, stick to essential oils (and absolutes, CO2 extracts, etc.). If you don’t mind synthetics, fragrance oils offer a wider range of scent options. Just note that essential oils have therapeutic and nuanced qualities that many people prefer, whereas fragrance oils are primarily for scent and can sometimes smell less complex.
Q: How much does it cost to make perfume at home?
A: After an initial investment in supplies, the cost per perfume is very low. Upfront, you might spend about $50-$100 to get a good range of essential oils, bottles, and tools. But those materials can make dozens of bottles of perfume. On average, a 2 oz DIY perfume might only use a few dollars’ worth of essential oils and alcohol. Compare that to $80+ for a similar size commercial perfume. So, each homemade bottle could be as cheap as $5-15 in ingredients (even less for simple recipes), yielding significant savings in the long run while you enjoy custom, high-quality fragrances.
Enjoy crafting your own signature scents, and welcome to the wonderful world of perfumery! If you have more questions or want to share your experiences, feel free to reach out or join perfume-making communities. Happy DIY perfuming!